
Looping Cut Up Regions in the Arrange Window
When you edit your drums in the Arrange window as audio, it’s common to have individual drum sounds like isolated kicks, snares, hats and more. This is a great way to edit your drum parts, but what happens when you’d like to loop the section you built? First you have to select the regions you want, and copy them, but pasting is not always easy because the snare for example is normally not on the start of a bar. You have to zoom in far enough so you know the copied snares you're about to paste are in the right position.
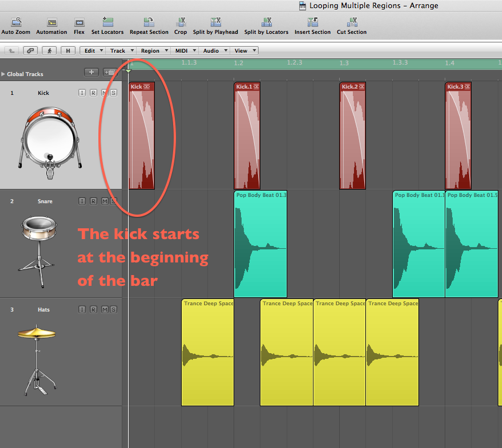
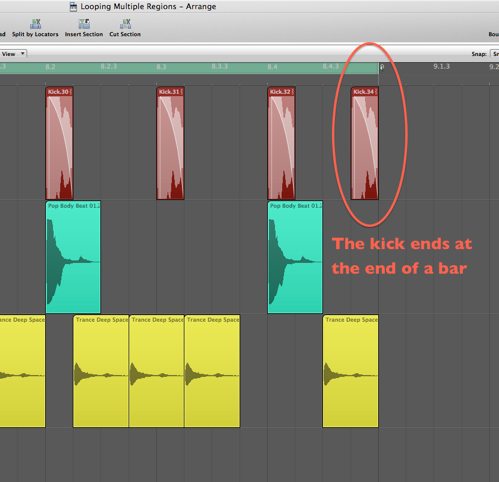
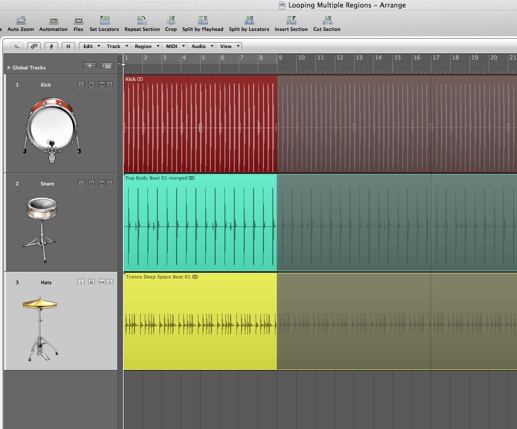
Let’s make looping cut up audio drums a bit easier by converting them to perfect neat 8 bar (or however long your part is) regions. First let’s do the kicks. These are easy for me, because they start at the beginning of a bar, and end perfectly on one too.
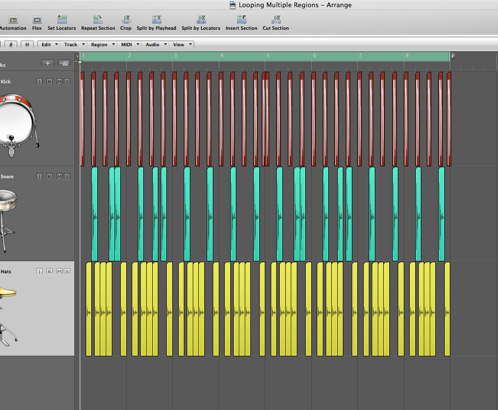
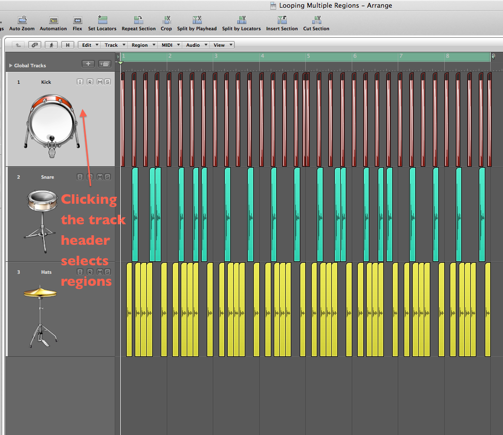
I’ll first click the track header for the kick. When I do this, all the regions on that specific track get’s selected, or if there’s a cycle enabled (as there is in the example image below), it will select only the regions inside the cycle area.
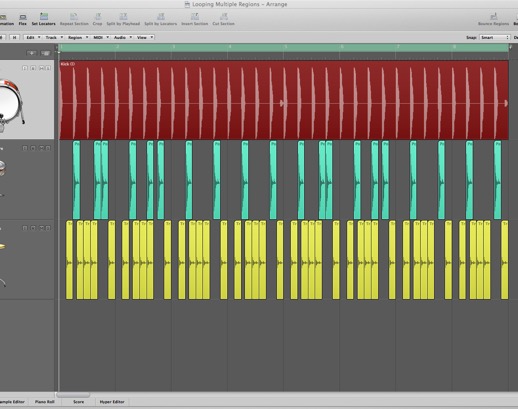
Once they’re selected, use key command ( Control • = ) to merge all the selected regions into one new region. A window will appear reminding you that if the regions you’d like to merge were not originally contiguous, a new region will be created. You want this, so select “Create.” The way I remember this one is I think; multiple regions added together equals one new region.
Now the snare and hats are a bit trickier. The snare for example doesn’t start or end at the beginning/end of a bar. If we simply used our ( Control • = ) command to merge all the snares, the resulting loop will be off, since it won’t be a perfect 8 bar block. Let’s fix this problem.
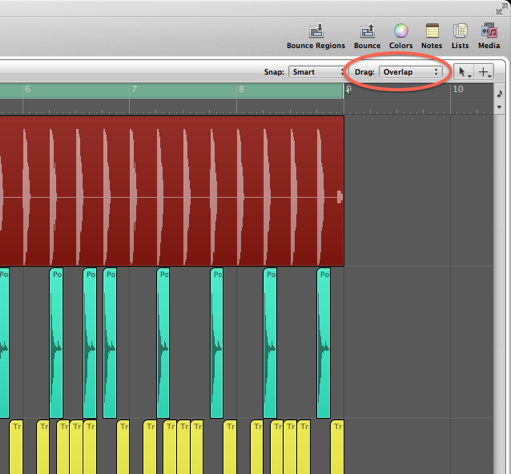
First, make sure “Drag” is set to “Overlap.”
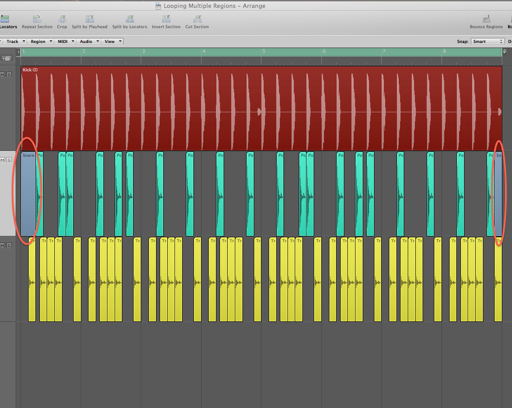
I’ll point to the beginning bar on the snare track and right/(control) click, then I’ll select “Create Empty MIDI Region.” Now I’ll move the timeline to the second beat of the bar, and use key command ( Command • ] ). This is a great command that adjusts the end of a region to the timeline position. You may have guessed that the ( [ ) adjusts the start of the region. Now I’ll do the end. I’ll just option click and drag the region I just made to then end, and adjust it’s end so it’s just a small sliver that stops exactly at the end of bar 8. Here’s how it should look...
Now I’ll select all the regions and merge them with the same technique I used on the kick above. I’ll do the hat in the same way I did the snare. Now I simply press “L” on all three regions to keep the beat looping!
Hope you enjoyed the tip!
blog comments powered by Disqus
Extracting a Drum for Separate Processing

There are often times when you want to quickly process a drum sound with it’s own set of effects. When you’re on a creative roll though, the last thing on your mind is setting up Multiple outs! In many cases like green Apple Loops and some third party drum modules, Multi-outs isn’t even available. Extracting a single drum sound for separate processing can be a quick and easy task. This tip is probably the fastest way to accomplish this. Keep in mind that if you’re running Logic on a slower system, this method requires the duplication of the channel strip (the instrument and all the plug-ins on it).
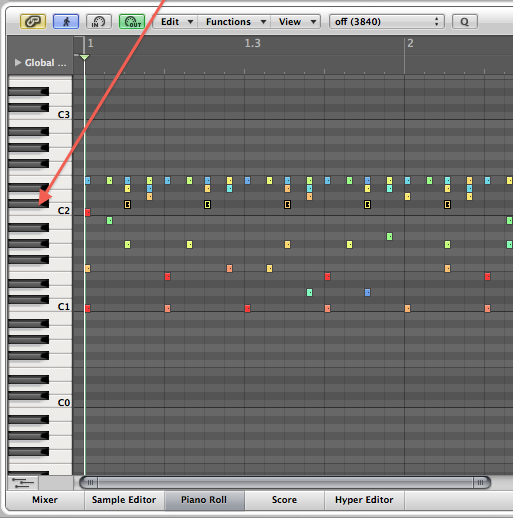
1. Open the region with the sound you’re extracting in the Piano Roll, and select the entire length of the sound by clicking it’s key on the vertical keyboard. (See Image Below).
2. Command - X to cut the sound from the region.
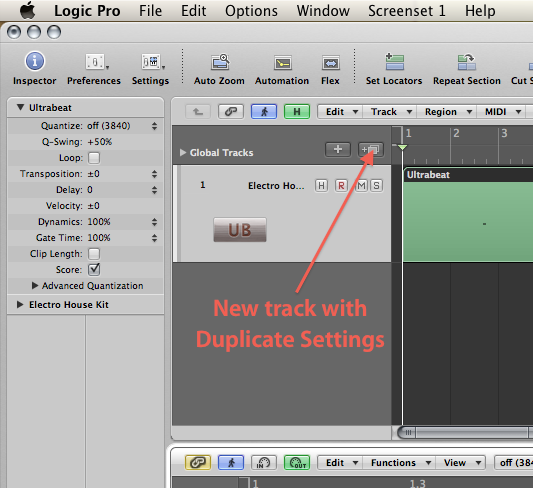
3. Next, duplicate the track/channel strip by clicking the “New Track With Duplicate Settings” button. (See Image Below).
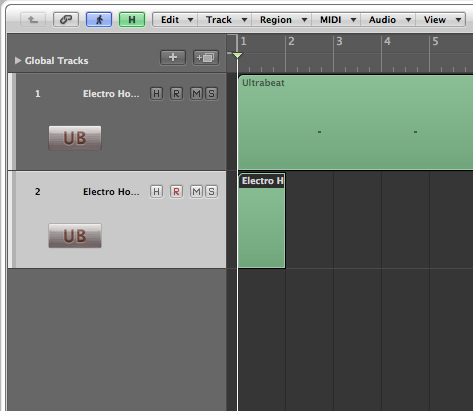
4. Control - Click/Right Click and select “Create Empty MIDI Region.” Make sure it’s placed at the same starting position as the original region. (See Image Below).
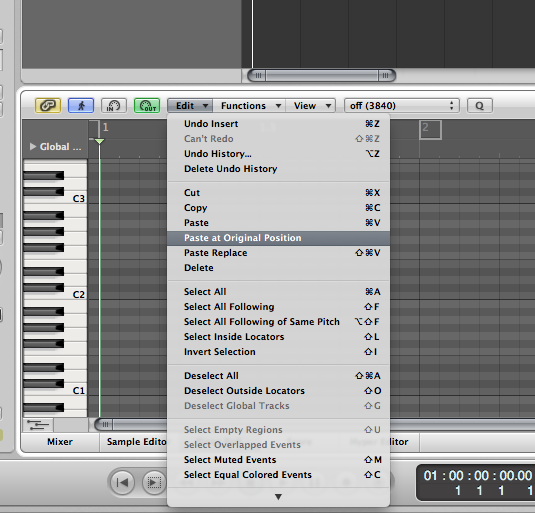
5. Double click to open the empty region in the Piano Roll, then select “Paste at Original Position” from the Edit menu. (See Image Below).
Done! The entire process takes about 10 seconds to complete. You don’t even have to resize the new MIDI region; when you paste, it automatically expands the region to fit the content.
Hope this helps, and thanks for reading.
blog comments powered by Disqus