Get Creative with Take Folders
17/10/11 17:51
Take folders are an invaluable addition to Logic Pro when you’re comping vocals, recording guitar, or any other live instrument. You can “quick swipe” sections from different recordings in a stack, to make a composite from the various parts. In this lesson, I’m going to show you a creative way to use Take Folders to make those “stop-chop” parts you hear often in Dubstep, and Electro/Progressive House.
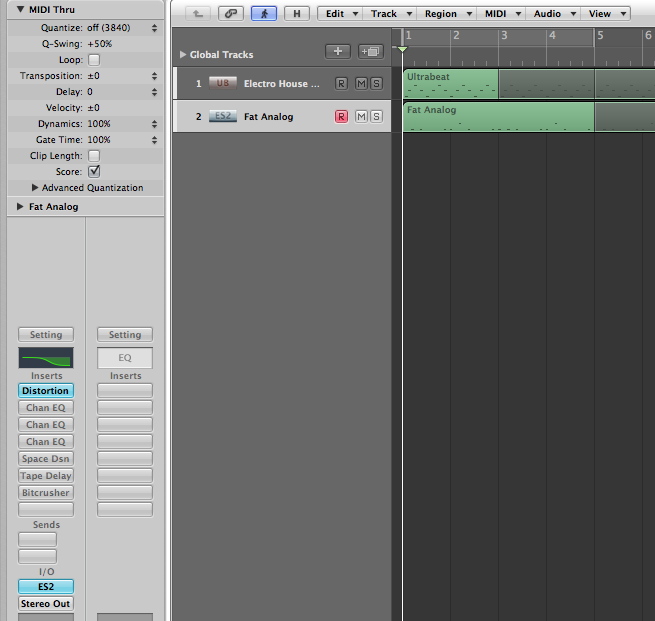
If you’ll be following along, open a Logic Project you’re already working on, or create a new one. I’ll be using an ES2 bass line that I recorded, and an Ultrabeat playing back a simple pattern. I’ve added various effects to this bass line like distortion, different EQ’s (high pass, low pass, and band pass), Reverb, Delays, and a Bit Crusher. I’ll only be using one effect at a time, so I’ve bypassed (option click) each of the different effects below the topmost effect (see image below).
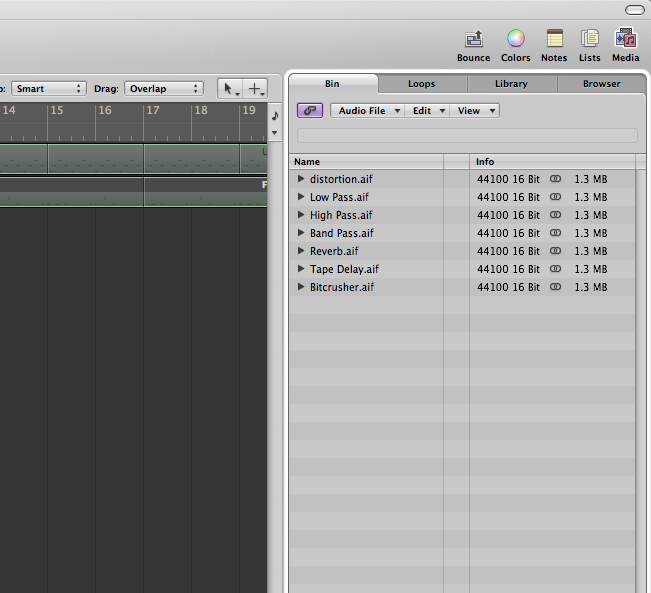
Make sure the region is selected, then go to Logic’s File menu, and choose “Export Region As Audio File” from the Export menu. (If you don’t have a key command set for this, try setting it to: Command - Option - R in the Key Command window.) You’ll want to navigate to the project’s Audio Files folder since Logic doesn’t seem to default to this location when using this command...even when your project is saved. Name the region your about to save so you’ll know which one has the specific effect on it. In my case, I’ll name this first one “distortion.” Make sure you check off “Add Resulting Files to Audio Bin” and un-check “Bypass Effect Plug-ins” before saving. Also, consider using “Overload Protection Only” from the Normalize drop down menu (this will actually LOWER the volume of the region below zero decibel if it was clipping). After you’ve saved the first region, option click to bypass the top effect you just used, then option click the one below it to enable it. Repeat the steps above to save the region with each of the effects you chose. You should end up with a collection of saved regions in your bin (see image below).
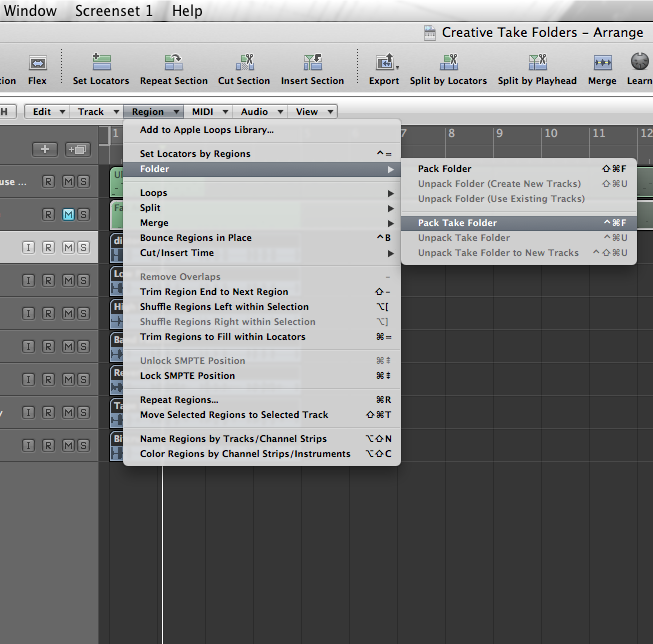
Display the Bin by hitting “B” on your keyboard if you haven’t done so already. Select all the files you just saved, and drag them all to the Arrange window at the same time. A window will appear with three options...choose “Create New Tracks.” This will place each region on a new track below one another. Make sure all the regions are selected (by default, all the tracks are selected after you’ve dragged them to the arrange window), and select “Pack Take Folder” from the Region Menu’s Folder Menu (see image below).
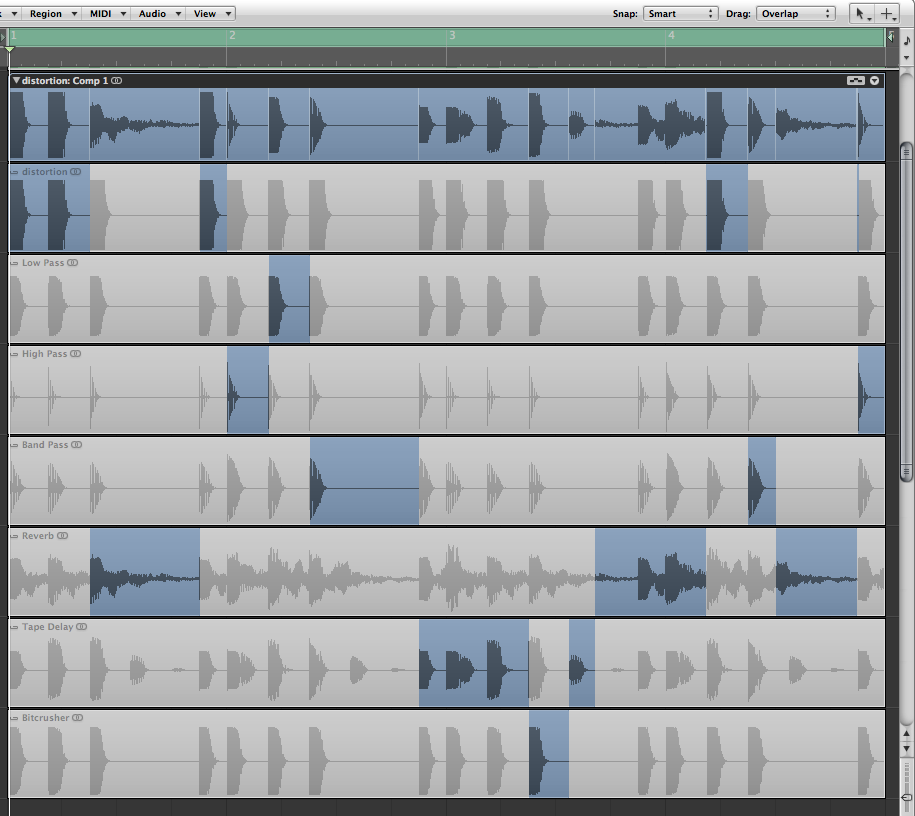
All the regions are now packed nicely into a Take Folder! Delete all the unused tracks below the take folder, then click the disclosure triangle to reveal the stack of takes within it. Here you’ll find all your saved regions named perfectly so it’s easy to see what take has what effect on it. Zoom the Take Folder by hitting “Z” on your keyboard, and start Quick Swiping! You’ll get blasts of different effects that stop where you’ve swiped to select the next segment. (see image below)
TIP: Currently, Quick Swipe Comping does not “snap to grid,” so be carful where you place your “swipes”...you should try to get them as close to a grid value as possible. You can change your grid value in the Transport window directly below the project’s time signature if you need a smaller or larger value. Hopefully in the next version of Logic this will be fixed/added!
Thanks for reading!
blog comments powered by Disqus
blog comments powered by Disqus